| 
| 
| 
|
|---|---|---|---|
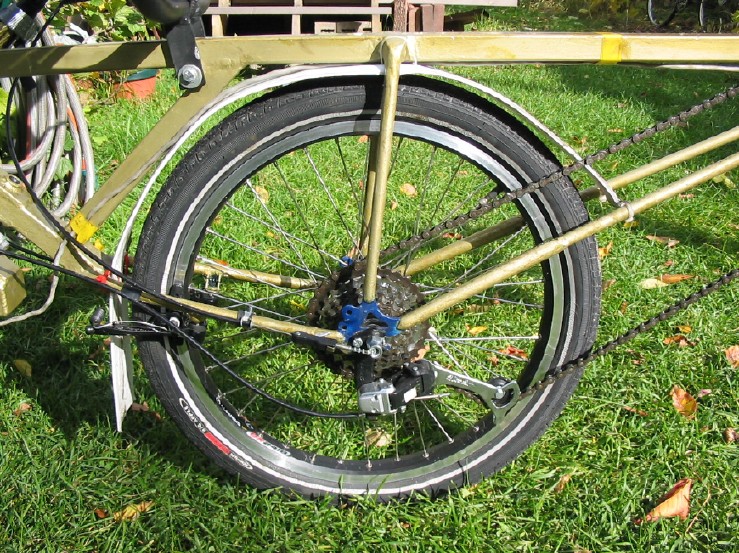
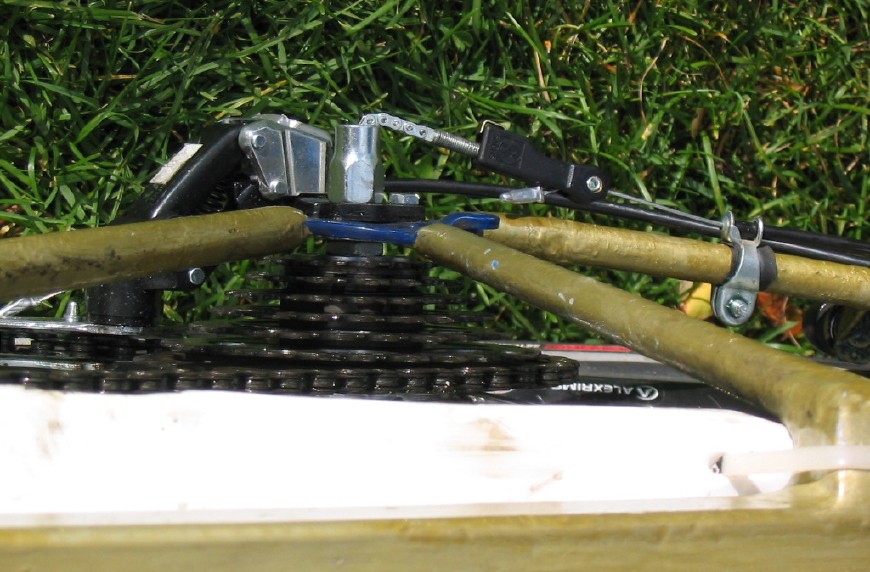
| 114. side view. | 115. top view, showing lots of cables. | 116. brake close-up. | 117. handlebars shortened and new shifters. |
Cargo Trike Construction Details - UpdatePage 3 - Completing frame details Page 4 - Paint, Cargo Box, Lights, and Road Test Page 5 - Getting the last bits done Page 6 - Observations, and photos of working and playing. Conclusion - when it's all said and done... Update: revised front wheel and brake. Update: revised front wheel and brake.Photos 114 through 117. While heading home after partaking in Car-Free Day, I actually managed to break the Sachs internal hub! I heard a bad noise and the trike would no longer move forward, so I had to drag it out of traffic to see what the problem was. After getting it on the sidewalk I noticed that the wheel was wobbling, and upon closer inspection saw that the coaster brake arm was undone. The bolt that holds the brake's clamp in place had sheared off, and the brake arm had rotated and then locked against the stay, but along the way enough torque was generated to snap the axle. I propped up the front end, undid the axle nuts, and the hub basically fell apart in my hands! Not good... So I managed to stuff all the innards back together, and re-installed the wheel, with the axle nuts keeping everything in place. I then had to walk the trike approx. 1.5 km back home along the sidewalks. While I may have been able to possibly find a spare axle somewhere, I was pretty sure other damage had occurred, based on noises the hub made while being walked home. And I had been thinking about how to get a wider gearing range anyway, so it was time to rebuild the wheel with another Sachs hub, but this time it would be their 3x7, which I just happened to have lying around (after purchasing about five years earlier). This hub has three internal gears and a freewheel for a 7-speed cassette, and I put together a custom cassette with sprockets from 14 to 32 teeth (Sheldon Brown has a page on how to do this), so I now have a gear inch range of 15 to 80, instead of the previous 20 to 65. So out came the old hub, and since the new hub had a slightly different flange size (and the wheel also had to be dished due to the cassette) I had use new spokes on one side (the old right side spokes fit on the left side, and new spokes went on the right. I did this because I had previously spent a lot of time cutting and threading spokes for the old hub, and wanted to re-use what I could). To fit the new wheel I had to spread the dropouts a bit, since the new hub was wider. I also had to fit the new shifters as well, and I had been meaning to shorten the handlebars a bit, so this was the time to do so! It took a bit of experimenting to run the cable from the left (internal) shifter, as the front end tilts but the handlbar doesn't, so I had to be careful where the cable housing was anchored. But the biggest issue was that I now also needed a new front brake! The coaster was gone, and there were no bosses on which to install a v-brake. So with only the two rear brakes (which tend to lock up when there's no weight over them if the cargo box is empty) I cycled the 6 km to Juergen's for a boss fitting! Once there I removed the wheel and cables and scraped off the paint where the bosses would go. Juergen expertly brazed them on in short order, and I was able to get the front brake working well enough to get me back home. I tried rigging up the right lever to pull both rear brakes, but that didn't work all that well so the trike came home with two out of three brakes. And for now it has stayed that way, as most of the braking is done with the front anyway. At some point I may make a splitter so that both rear brakes are pulled, but for now it doesn't seem to be needed. (A heavy load down a long hill may change that neccesity, but fortunately there are few hills here in town, and none on my downtown routes.) |
|
|
|
|
|
|---|---|---|---|
| 114. side view. | 115. top view, showing lots of cables. | 116. brake close-up. | 117. handlebars shortened and new shifters. |