Cargo Trike Construction Details - Page 4
Page 1 - Rear frame and pivot
Page 2 - Front frame
Page 3 - Completing frame details
Page 4 - Paint, Cargo Box, Lights, and Road Test
Page 5 - Getting the last bits done
Page 6 - Observations, and photos of working and playing.
Page 7 - Update: revised front wheel and brake.
Conclusion - when it's all said and done...
Paint, Cargo Box, Lights, and Road Test!
Photos 68 through 91.
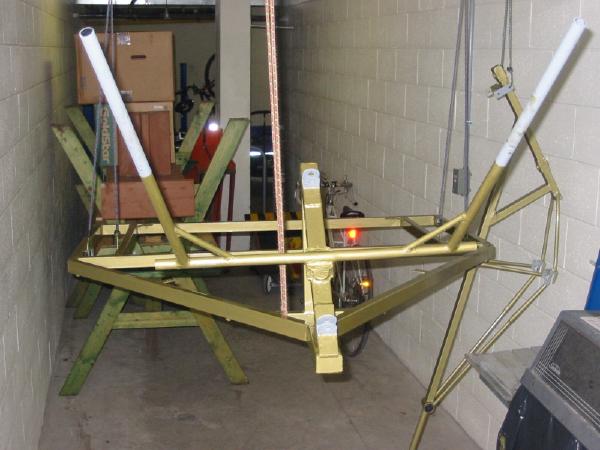
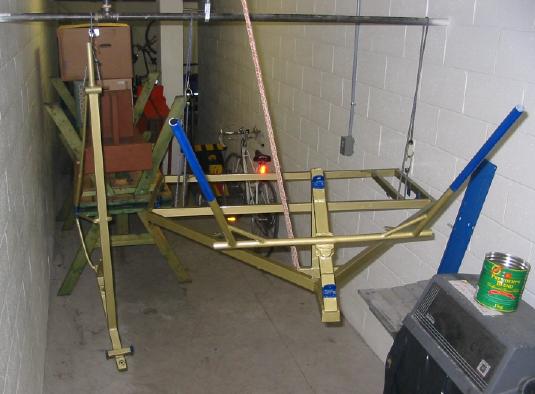
With the welding complete it was time to get the frame painted. I pondered the idea of getting it powdercoated, but it looked like it would cost me about $300, and being the cheap guy that I am I decided that good old TremClad would have to do! TremClad is a soft enamel paint, and does scratch and chip easily, so in one respect it's not the best coating for a utility vehicle. But the good part about it is that I can easily touch up the paint outdoors during the warm weather months. Juergen was able to convince me to use a good automotive primer on the bare metal, and to also use a good metal prep ahead of time to clean off welding residue and oil from bare hands handling the tubes. The TremClad has so far received some scratches. but these have not gone through the layer of primer to the bare metal.
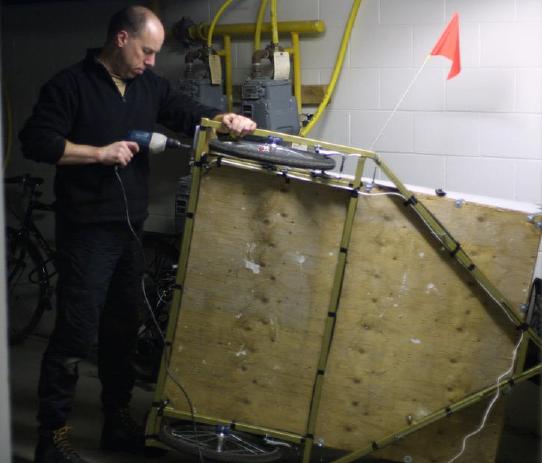
I borrowed a friend's car to move the two-part frame over to a garage at my friend Jody's apartment building. This garage has a separate ventilation system than the units above, so I hoped that any fumes would go straight outside. And a unique feature was that it has parking only for bikes! So were are no cars down there, and at that time of year only a very few cyclists would be coming and going. So the frame was hung via bungee cords from some overhead pipes, and I got to work.
Over the Christmas Holidays and after New Years I would cycle over there along slushy streets and do the various steps. Using the metal prep I washed down the frame, and then rinsed with water. I put on the first coat of primer, and then a second one a day later. I decided on a TremClad finish called "Hammer", and chose gold as the colour. This finish comes in gold, silver, and grey, and since my HPVOoO gang decided to take part in the upcoming St. Patrick's Day Parade, I figured that would make for a good debut gig for the trike, and so now I had a deadline!
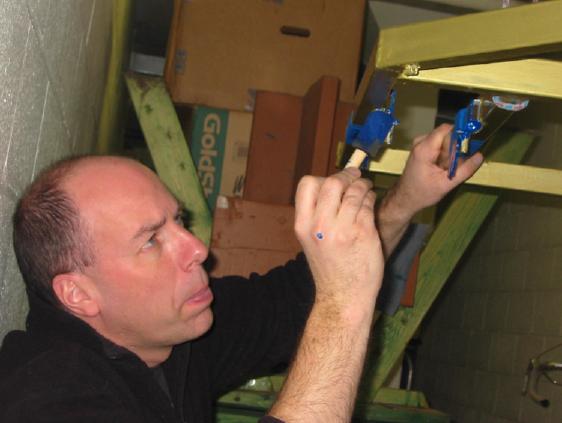
I got together all the remaining parts I would need: the shifter for the Sachs hub, brakes, levers, cables, cable housing, and parts for the front lighting mount. This mounting bar was made from a thin-wall aluminum tube that used to be Juergen's old shower curtain rod! It was attached to the boom tube using a road bike stem, as I used this because the stem in the horizontal position angles back, and I wanted the tube to be a bit behind the head of the stem in case the trike bonked into a wall or something, and the lights wouldn't take the hit.
The distance from each brake lever to its corresponding V-brake at the rear was just a bit too long for a standard cable. So I used an extra length of cable to make up the difference, and this was conected to the main one via a straddle cable clamp, which had its hole widened to accept the double thickness. I of course had to make sure there would be no cable housing for this section, and didn't want to use more housing that neccesary anyway, to cut down on friction.
And speaking of the lights...
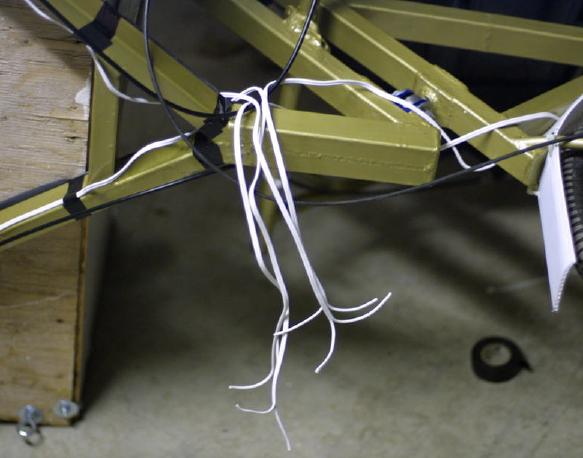
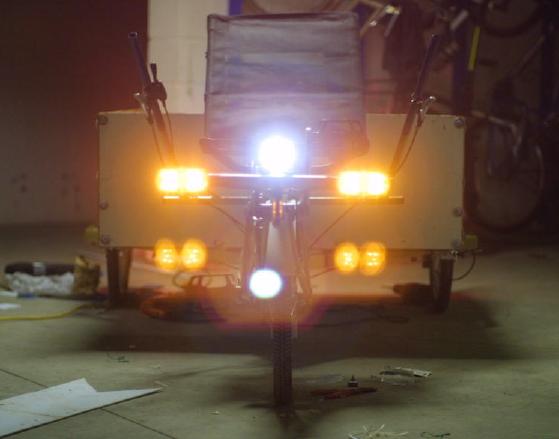
One thing I knew from the start was this thing should have turn signals of some sort. Since I had originally planned to have a fully enclosed box on the back I knew that traffic behind me would not necessarily see my arm stuck out in the usual bike signal mode. I did in the end decide to go with a lower open box, so that is not as much an issue while carrying the drums, but if I carry anything taller then the signals would still be needed. This was something that I would definitely need help with in terms of some sort of switching circuit, and fellow HPVOoOer Richard Briggs offered to help me with this part of the project. Details on what he and I decided on, as well as his description of the circuit, can be found at my trike lighting page.
And about that cargo box...
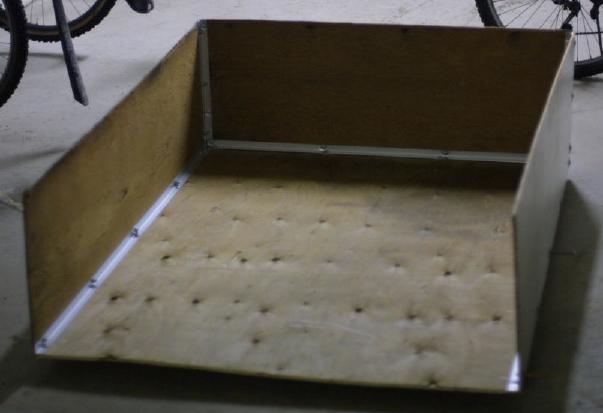
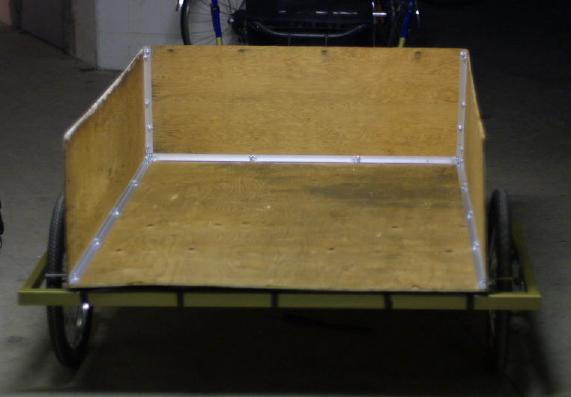
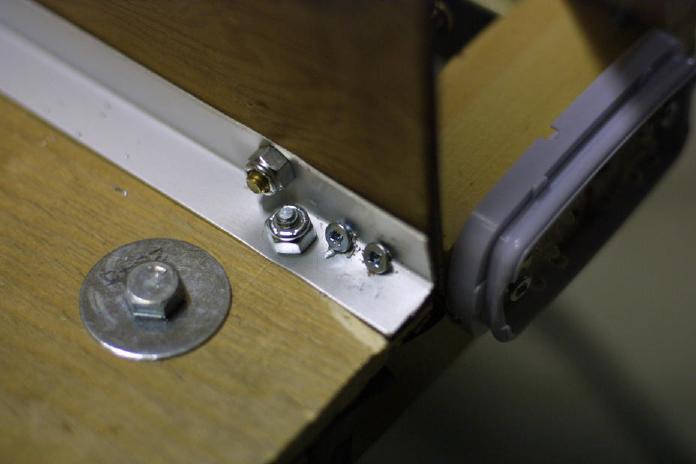
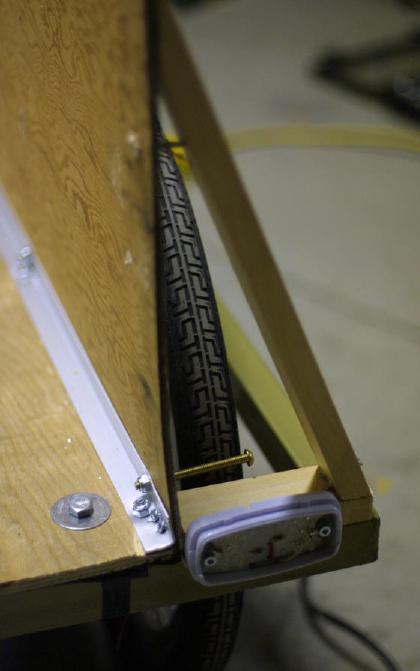
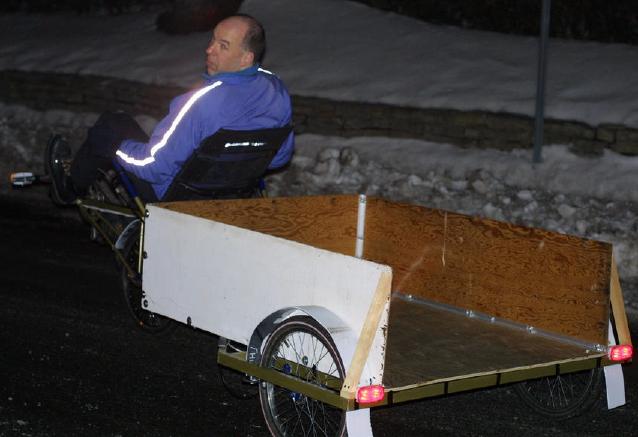
In the end I decided upon a low pick-up style box made from thin plywood, with a removeable tailgate. I also installed a eye-bolts around the inner and outer edges from which to attach bungee cords and ropes for a tarp, or to tie down large objects. While prototyping I just used some scrap wood I had lying around (figuring that once I sorted out the design I could rebuild it with exterior-grade plywood coated with a nice marine varnish to protect it). I held it all together with bolts and nylock nuts drilled through aluminum L channel. I lucked out at the local scrapyard, and got six 9-foot pieces of this stuff for $10! These strips allowed for the wood pieces to be joined continously, instead of using standard narrow L-brackets. The bottom panel and tailgate (details on the next page, as I added this after I got the trike home) are of 3/8" ply, and the sides are 1/4". Inner tubes were sliced to lie flat and taped along the top of the rear frame to protect the paint job, and to also hopefully eliminate any vibrational noises.
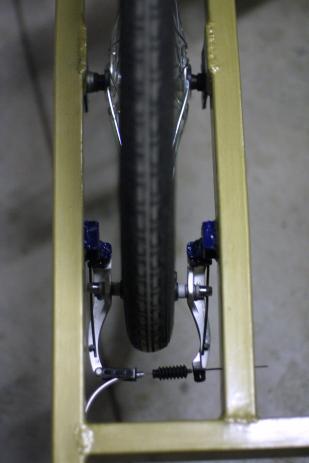
All the wheels needed fenders, and for this I used the favourite material of just about every HPV homebuilder: coroplast. A heat gun was used to bend the strips into the shape I needed, and I mounted the rear ones with zip-ties to some bolts that stuck out from each side of the box. These were trimmed to fit inside the V-brakes to keep as much rain and gunk as possible off the moving parts. The front fender was zip-tied to the frame, and I left all three extra-long to keep the amount of rear spray to a minimum.
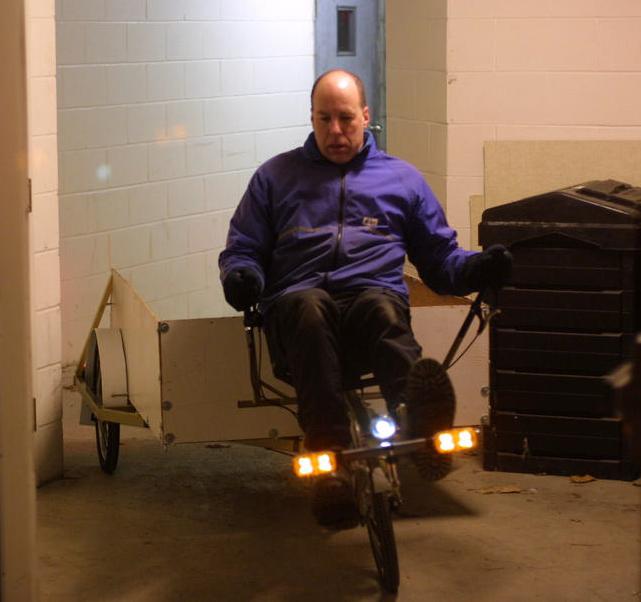
To get the trike in full test mode we had to have the lights running, so while I played with the fenders Richard hooked up the battery and taped it in place (since the battery box had not yet been built) ran all the wiring so I could go for a spin. We used regular lamp cord for this, but while it did the job it was overkill and quite fugly, and so later on we switched to a multicore cable for all the wiring. After a brief road test we claimed success and called it a night. Being that it was late (like 4:00am!) and I had no turn signals yet, I came back a few days later to ride the beast home during daylight hours. Richard followed along on his huge chopper named Goldmember and took a few pictures...
|